Tools
- Each piece of a flow is essentially one tool.
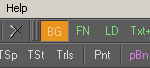
- There are a few different ways to add tools to the flow. The easiest way is to click on an abbreviation for the tool you would like to add on the top of the screen. For example, clicking on the green letters BG would add a Background tool to the flow.
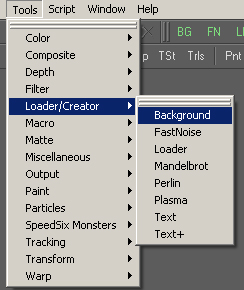
- If, for instance, the tool is not listed on the top bar you could go to the Tools menu and select a tool from the list. These two ways are enough to get started, although there are a few other ways to add tools.
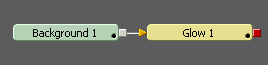
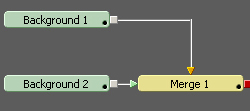
- When one tool in the flow is currently selected while another tool is being added, the added tool will automatically be connected to the output of the currently selected tool if possible. If there is no input on the added tool, the two tools will usually be joined by a Merge tool. There are only a few exceptions to these cases.
---> ---> --->
--------OR--------
--->--->
Viewports
- In the top left, under the icons for "New" and "Open," there are 4 buttons that are associated with different viewport layouts. Throughout the tutorials, it is best to use the second option. This allows you to have a Left and a Right view while also having a large area for the tool options to be displayed in the right column.

- To display a tool in either the Left or Right views, drag the tool from the Flow section to the view and drop it there. It is also possible to right click the tool you want to view and select View On-->[view] (where [view] is whatever View you want to see the tool on). Alternatively, you can select a tool and hit the '1' key on your keyboard to show it in the Left view (View 1) or hit '2' to show it in the Right view (View 2).

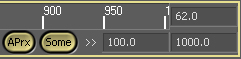
Render Range
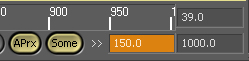
- The Render Range determines how many and which frames Digital Fusion will Render and/or Playback. The first frame is set in the second box on the bottom left of the Flow window and the last frame is set in the second box in from the right side of the same area.
 -- --
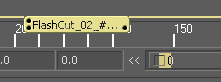
- By dragging a Loader tool to the time bar on the bottom of the screen and dropping it, the Render Range will automatically be set to the length of the clip(s) in the Loader.
Current Frame
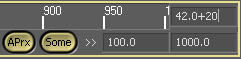
- Changing to a specific frame is as simple as typing the frame number in the current frame box and hitting the enter key. The current frame box is located at the end of the time bar.

- If you want to go 20 frames ahead in time and your current frame is 42, you could type 42+20 in the frame box and hit enter. Most common mathematical operations work in this way, in most boxes.
 ---> --->
|
