Procedure
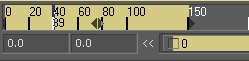
01) Set the render range from 0 to 150.
 <---> <--->
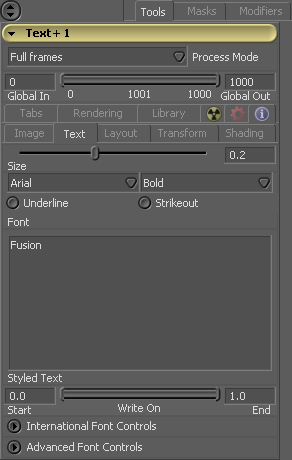
02) Create a Text+ tool and under the Text tab, type 'Fusion' in the Styled Text box. Set the size to 0.2. Bring this tool up on the Left view.
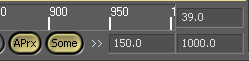
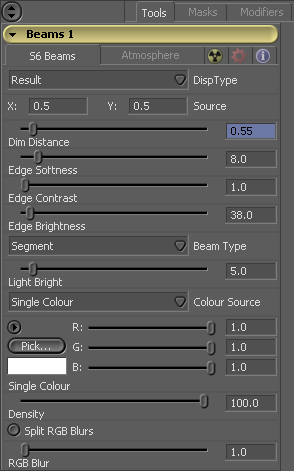
03) Add a Beams tool from Box 17 of the SpeedSix Monsters after the Text+ tool. Bring the Beams tool up on the Right view. Set the Dim Distance to 0.55 and the Edge Brightness to 38.0.
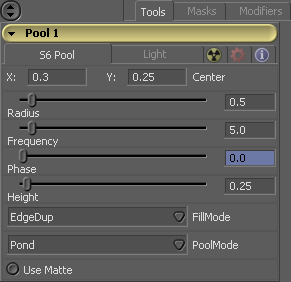
04) After the Beams tool, add a Pool tool from Box 02 of the SpeedSix Monsters. Bring this tool up on the Right view. Set the center to x:0.3 and y:0.25. Set the Frequency to 5.0 and Height to 0.25. Make sure you are on frame 0, then Animate the Phase and be sure it is set to 0. Go to frame 150 and set the Phase to 2.0. Play through the sequence to see how this affects the output.
05) Select the Text+ tool. On the Shading tab, set the Opacity to 0. Make sure playback is stopped and go to frame 0. Animate the Opacity property. Go to frame 50 and set the Opacity to 0.7. This will make the text fade up from nothing over frames 0 to 50.
06) The Beams should also fade up. Select the Beams tool. At frame 65, Animate the Dim Distance. This is the frame in which the Beams will be their highest. Go back 20 frames to frame 45. Set the Dim Distance to 0. Play the whole sequence back to see where you are at.
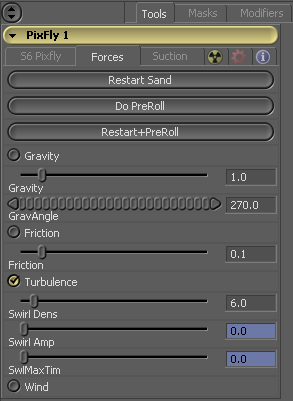
07) Now, add a PixFly tool from Box 03 of the SpeedSix Monsters after the Pool tool. Bring this tool up on the Right view. Set the PreRoll to 1 and the Vel Jitter to 0. Go to frame 70 and click Restart+PreRoll on the PixFly tool menu. Play the sequence so you can see what the PixFly tool can do. One thing to remember is that when changing any part of the PixFly tool, or any tool prior to that in the flow, you should go to frame 0 and click Restart+PreRoll to be sure that your changes will take effect. This process should be done before rendering and/or playing back the sequence in Fusion.

08) Under the Forces tab, uncheck everything but Turbulence. Set the Swirl Dens to 6.0, Swirl Amp to 0, and SwlMaxTim to 0. Go to frame 65 and Animate Swirl Amp and SwlMaxTim. Step one frame forward to 66 and set the Swirl Amp to 4.0 and the SwlMaxTim to 33.0. Go to frame 0, Restart+PreRoll, and playback the whole sequence.
09) Next, add a Blur/Sharpen tool after the PixFly tool. Bring this tool up on the Right view and bring the PixFly tool up on the Left view. At frame 62, set the Blur Size to 0 and Animate it. Go to frame 67 and set the Blur Size to 16.
10) All done! Play the whole sequence back once more and notice the difference between the Left and Right views.
|